使用骨架屏减少首屏白屏现象
背景
用户从输入 url 到打开页面,经历的步骤可以参考这里。现代前端应用程序通常使用 React、Vue、Angular、Solid 等框架进行开发,这些框架统一管理工程化内容。
这也导致了一个问题:通过这些框架开发的单页面应用(SPA)通常只包含一个 <div id="app"></div>,而其余内容都是在后续脚本运行时动态渲染。这使得用户加载的 HTML 页面往往呈现为白屏,只有等到脚本解析执行后,内容才会呈现。因此,服务端渲染(SSR)应运而生,它在服务器端就将内容渲染好并返回给前端,虽然这需要整体改造项目,成本较高。另一种方案是使用首屏骨架图渲染,以减少白屏现象。
原理
骨架屏的原理是直接将骨架图嵌入 HTML 中,实际内容加载完毕后将骨架图替换为真实内容。
生成骨架屏的方式
- 单独编写骨架屏样式并注入:需要手动维护样式。
- 使用骨架屏图片:适合简单场景,但不够灵活。
- 自动生成骨架屏:
page-skeleton-webpack-plugin:不再维护,不推荐。- 使用 Chrome 插件生成骨架屏,比如
@killblanks/skeleton-ext,效果不错,但样式需要微调。 - 自定义实现,原理简单,将页面的文字和图片替换为骨架图形式。参考源码。如果你恰巧有
油猴插件,也可以直接安装脚本使用点击直达
实战
注入代码 1 - 注入进 #app 内
这里我使用的是 vite 打包工具,webpack 可以使用类似的方法。
首先需要编写一个插件,在生成时修改 HTML 代码:1
2
3
4
5
6
7
8
9
10
11
12
13
14
15
16
17
18
19
20
21
22
23
24// /plugins/skeletonPlugin.ts
import { PluginOption } from 'vite';
import { join } from 'path';
const filename = join(__dirname, './homeSkeleton.js');
export function SkeletonPlugin(): PluginOption {
return {
name: 'SkeletonPlugin',
async transformIndexHtml(html) {
const content = (await import(filename)).default;
const code = `
<script id="skeleton-script">
var map = ${JSON.stringify(content)}
var pathname = window.location.pathname
var target = map[pathname]
var content = target && target.html || ''
content && (document.querySelector('#skeleton-script').parentElement.innerHTML += content)
</script>
`;
return html.replace(/__SKELETON_CONTENT__/, code);
},
};
}
在 HTML 中,<div id="root"> 内部增加内容 __SKELETON_CONTENT__,以便填充骨架屏。1
2
3
4
5
6
7
8
9
10
11
12
13
14<!-- /index.html -->
<html lang="en">
<head>
<meta charset="UTF-8" />
<link rel="icon" type="image/svg+xml" href="/vite.svg" />
<meta name="viewport" content="width=device-width, initial-scale=1.0" />
<title>Vite + React + TS</title>
</head>
<body>
<div id="root">__SKELETON_CONTENT__</div>
<script type="module" src="/src/main.tsx"></script>
</body>
</html>1
2
3
4
5
6
7// /plugins/homeSkeleton.js
export default {
'/home': {
pathname: '/home',
html: `<div>xxx 骨架图内容 xxx</div>`,
},
};
需要注意的是,页面入口的 <script> 需要设置为 defer,以确保骨架图代码生效,避免阻塞后续代码执行。
粗糙一点的实现是,在 plugins/skeletonPlugin.ts 中暴力将所有 <script> 标签新增 defer 属性,虽然这种方式不够优雅,但可以解决问题。(这里有误,第二节已解释并修改)1
2
3
4
5
6
7
8
9
10
11
12
13
14
15
16
17
18
19
20
21
22
23
24
25
26// /plugins/skeletonPlugin.ts
import { PluginOption } from 'vite';
import { join } from 'path';
const filename = join(__dirname, './homeSkeleton.js');
export function SkeletonPlugin(): PluginOption {
return {
name: 'SkeletonPlugin',
async transformIndexHtml(html) {
// 新增
const modifiedHtml = html.replace('<script', '<script defer');
const content = (await import(filename)).default;
const code = `
<script id="skeleton-script">
var map = ${JSON.stringify(content)}
var pathname = window.location.pathname
var target = map[pathname]
var content = target && target.html || ''
content && (document.querySelector('#skeleton-script').parentElement.innerHTML += content)
</script>
`;
return modifiedHtml.replace(/__SKELETON_CONTENT__/, code);
},
};
}
源码:https://github.com/popring/vite-skeleton/tree/v1
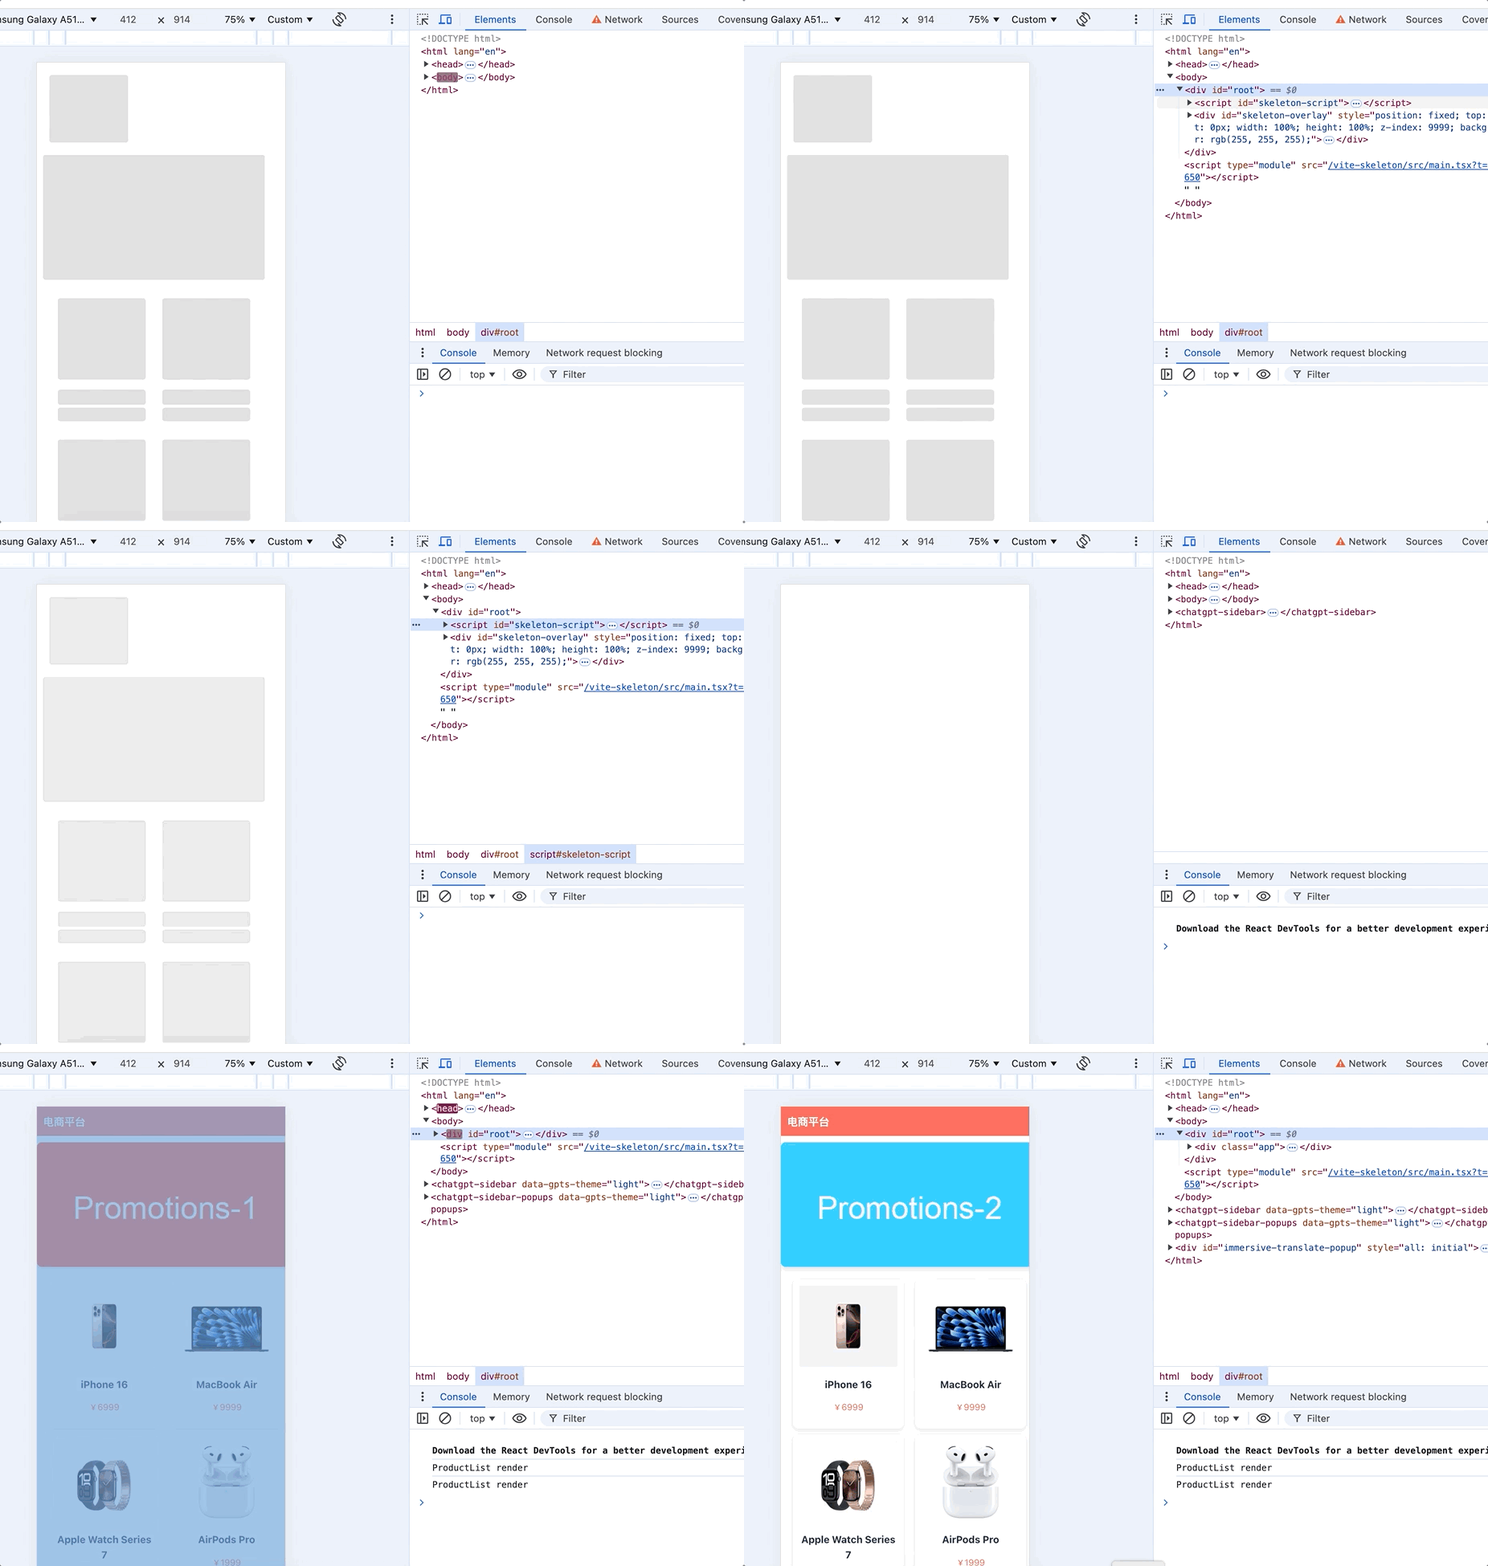
至此,该方案基本完成。然而在实际应用中,仍会出现白屏闪烁现象,这是由于框架加载页面时的异步加载导致的,首先渲染根路由信息,然后才会渲染具体路由的信息,因此该方案有待进一步完善。
想要还原这种场景只需要在路由位置加一个 Suspense 标签就可以
改动位置:https://github.com/popring/vite-skeleton/commit/7c0eccb4106be99f28c7106cb7fd1584203a31e3

如图,可以很明显看出白屏情况
注入代码 2 - 优化,显示在页面最上层
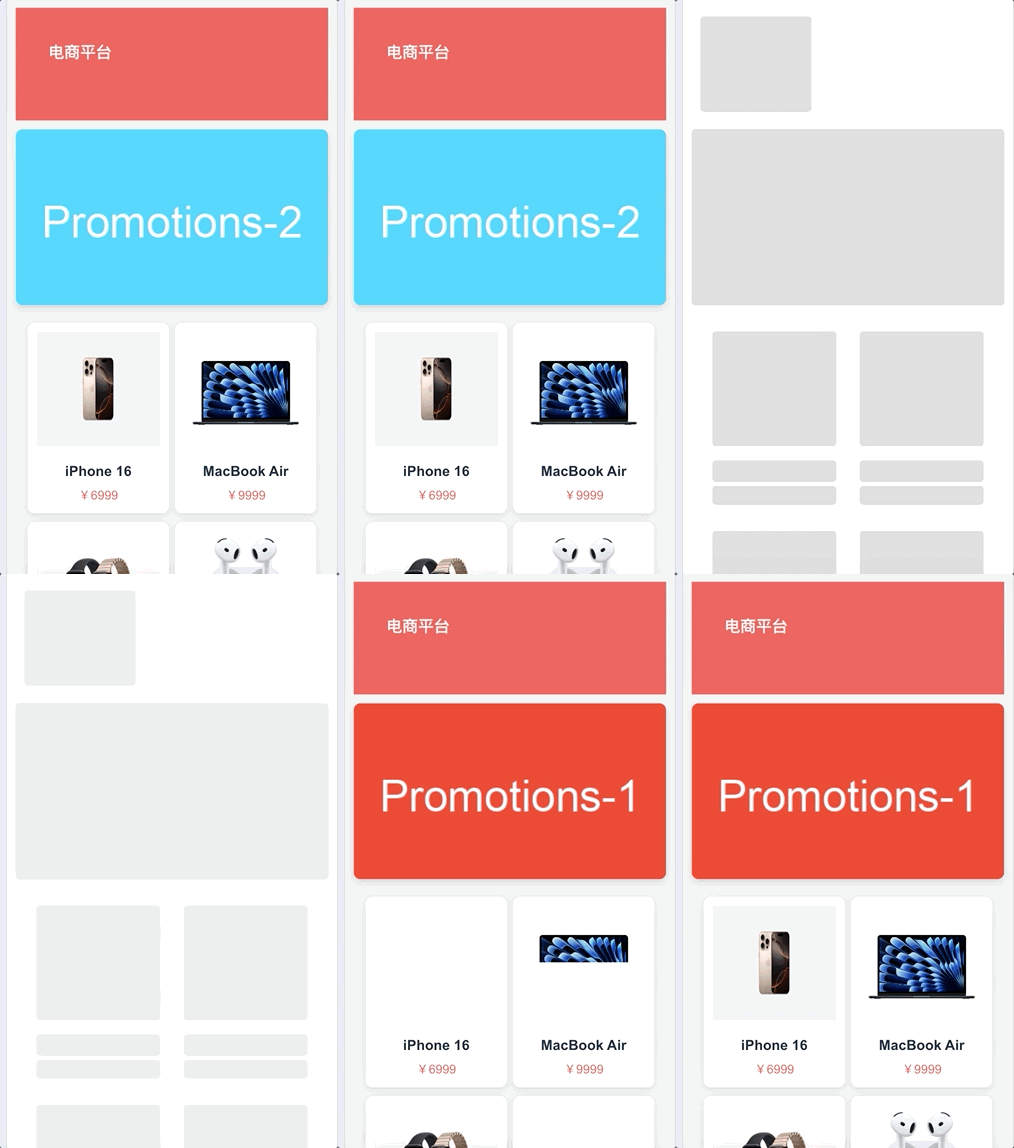
可以将骨架屏渲染在一个空的 div 中,并通过 fixed 样式将其固定在页面的最上层。随后,监听页面实际渲染的状态,页面渲染完成后将骨架图隐藏,从而在视觉上达到良好的效果。
新增改动1:script defer修改,经调试 vite 源码 发现已内置 async,另外,由于 type=”module” 情况默认就是 defer , 所以其实不需要加都可以。(尴尬)
新增改动2:plugin注入代码调整:1
2
3
4
5
6
7
8
9
10
11
12
13
14
15
16
17
18
19
20
21
22
23
24
25
26
27
28
29import { PluginOption } from 'vite';
import { join } from 'path';
import { readFile } from 'node:fs/promises';
// 骨架图映射数据
const filename = join(__dirname, './homeSkeleton.js');
// 骨架图展示隐藏逻辑
const code = await readFile(join(__dirname, './script.js'), {
encoding: 'utf-8',
});
export function SkeletonPlugin(): PluginOption {
return {
name: 'SkeletonPlugin',
async transformIndexHtml(html) {
const content = (await import(filename)).default;
return {
html,
tags: [
{
tag: 'script',
injectTo: 'body',
children: `var map=${JSON.stringify(content)};${code}`,
},
],
};
},
};
}
其中 script.js 内容如下:1
2
3
4
5
6
7
8
9
10
11
12
13
14
15
16
17
18
19
20
21
22
23
24
25
26
27
28
29
30
31
32
33
34
35
36
37
38
39
40
41
42
43
44
45
46
47
48
49
50
51
52
53
54
55
56
57
58
59
60
61
62
63
64
65
66
67
68
69
70
71const wrapId = 'skeleton-overlay';
function showSkeleton(content) {
let sEl = document.getElementById(wrapId)
if (sEl) {
sEl.style.display = 'block';
return
}
document.body.innerHTML += content
}
function removeSkeleton() {
const skeletonDom = document.getElementById(wrapId);
if (skeletonDom) {
skeletonDom.style.display = 'none';
}
}
function matchPathname() {
var pathname = window.location.pathname;
var target = map[pathname];
var content = (target && target.html) || '';
return content;
}
// 辅助函数,用于检查节点或其子节点是否包含指定类名
function hasClassName(node, className) {
if (node.classList.contains(className)) {
return true;
}
for (const child of node.children) {
if (hasClassName(child, className)) {
return true;
}
}
return false;
}
function observeDOMChangesForClassName(targetNode, targetClassName, callback) {
const observer = new MutationObserver((mutations) => {
for (const mutation of mutations) {
for (const addedNode of mutation.addedNodes) {
if (addedNode.nodeType === 1) {
// 检查当前节点及其子节点是否包含指定类名
if (hasClassName(addedNode, targetClassName)) {
callback(addedNode);
observer.disconnect();
return;
}
}
}
}
});
observer.observe(targetNode, { childList: true, subtree: true });
}
function startCheck() {
const content = matchPathname();
if (content) {
// 展示骨架图
showSkeleton(content);
// DOM中出现指定元素,隐藏骨架图
observeDOMChangesForClassName(document.body, 'product-list', () => {
console.log('hidden showSkeleton');
removeSkeleton();
});
}
}
startCheck();
实现效果如下:

最终代码
GitHub 链接
最后
本文主要是根据实践提出骨架图实现思路,其中代码有挺多可以优化的地方,切勿直接搬运到项目中落地,有问题欢迎指出。
参考
Vue项目骨架屏注入实践
一个前端非侵入式骨架屏自动生成方案